Manage Users
Return to Manage Infrastructure
From the Manage Users page you can choose to Create New Users, Manage Existing Users from the User List, view their properties or history, and manage search options for users.
Users with the “ServicePRO Administrator” privilege can add, update, or de-activate a user. Users with the "Submit" privilege can only add or update a user.
Navigation
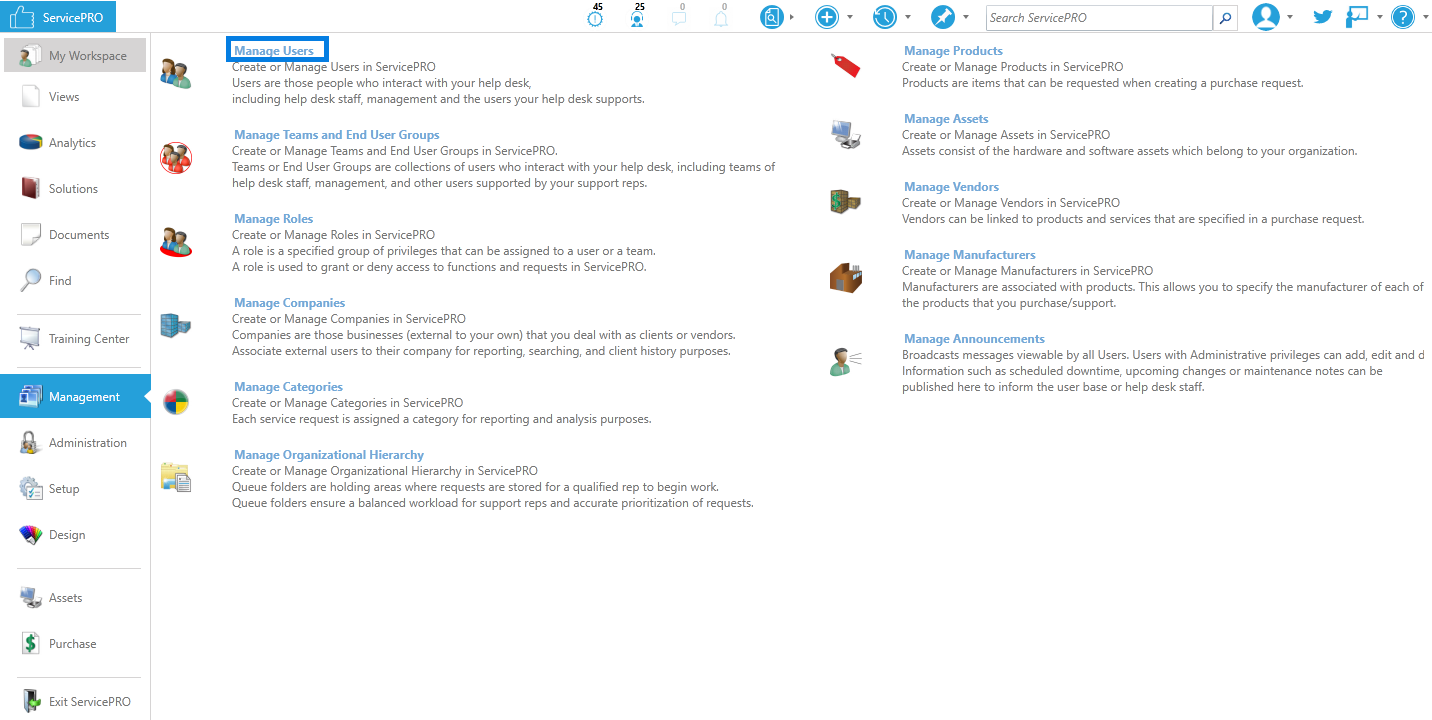
- Navigate to the backstage menu by clicking on the ServicePRO icon.
- From the Management tab, click on the Manage Users option as highlighted below.
Ribbon Toolbar
In the Manage Users main window, you can choose to Create New Users, Manage Existing Users from the User List, view their properties or history, and manage searches for users.
Create - New User
Selecting New User will open the New User window. The following tabs are available:Main Tab
Complete the following steps to manually add new users to ServicePRO:
User Name - Enter the user’s full name. This name must be unique. If multiple users have the same name, enter additional information to distinguish one from another. All users will use this field as their login username for ServicePRO.
Display Name - Automatically copies the value from the User name. There cannot be duplicate User Names in the system; however, there can be multiple identical Display Names. For example: If two people have the same name. They would require two different User Names but both of their Display Names can be the same.
Each user must be associated with an OU or company. Select one of the following user types:
- Internal User – must be associated with an OU (department). Select the OU from a drop-down list of existing OUs.
- External User – must be associated with a company. Select the company from a drop-down list of existing companies.
Designation - Each end user can either be designated as a User or a Manager.
- User - the default designation. Users can only see and update requests that they submit.
- Manager - This type of user can view and update service requests created by other end users in their own company or Organizational Unit. (Note: Whenever an End user that is designated as "Manager" is assigned with one or more roles, the Designation will be set back to "User" as they will no longer be considered an end user but a privileged user.)
Enter Contact and Workstation information in the remaining fields.
Logins/Emails Tab
Logins - Select the Enable radio button if you want to enable the user to login to ServicePRO, ServicePRO Web, or Self-Service Portal using a ServicePRO account.If logins are enabled, you can enter a ServicePRO password for the users in the Password field. If you do not enter a password, the default password “helpstar” is automatically assigned.
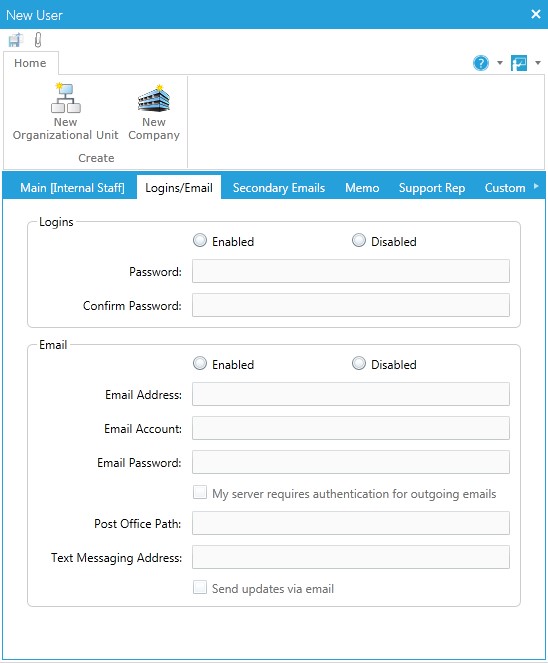
Email Address - If email option is enabled, enter the user’s primary email address here.
Post Office Path - This is an optional field used for reference purposes only.
Text Messaging Address - If applicable, enter a Text Messaging Email Address. This address is required to send a message to the user when specified events occur, as determined in their User Options.
Check the Send updates via Email checkbox to enable email notification to users when their Service Requests are updated. Notifications are sent in the form of ‘Current Memo’ or ‘Entire History’ based on the option selected from System Options by the administrator.
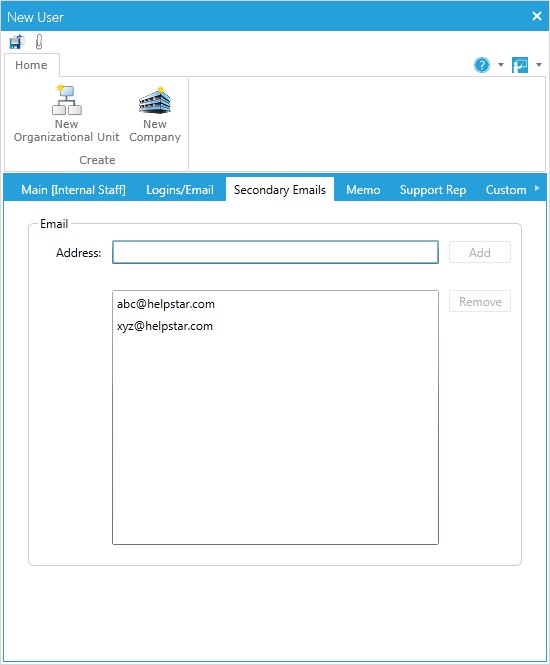
Secondary Emails Tab
On this tab, add any secondary emails for this user. Emails sent to ServicePRO from these accounts will be logged with this user as the requester.
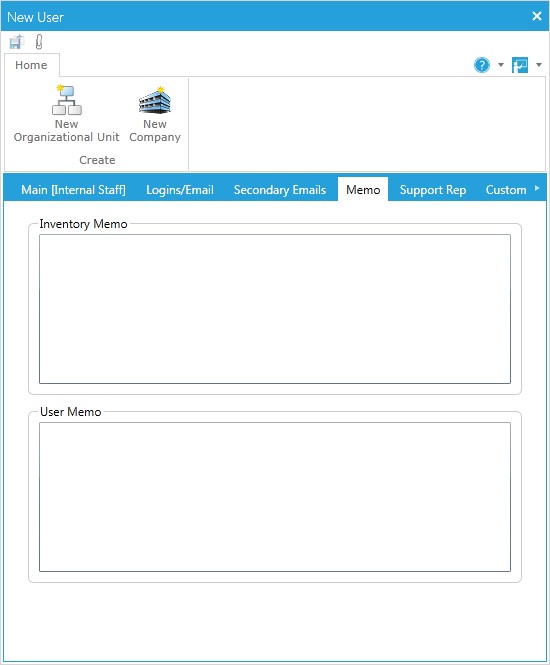
Memo Tab
ServicePRO uses two types of memos:Inventory Memo – Used in older versions of ServicePRO to store the results of the computer audit. ServicePRO now stores this information in the Discovered Hardware or Discovered Software windows. This remains a part of the software for backwards compatibility.
User Memo – Used to enter any additional information for the user.
Support Rep Tab
The Support Rep tab helps you define options and hourly rates for a Support Rep.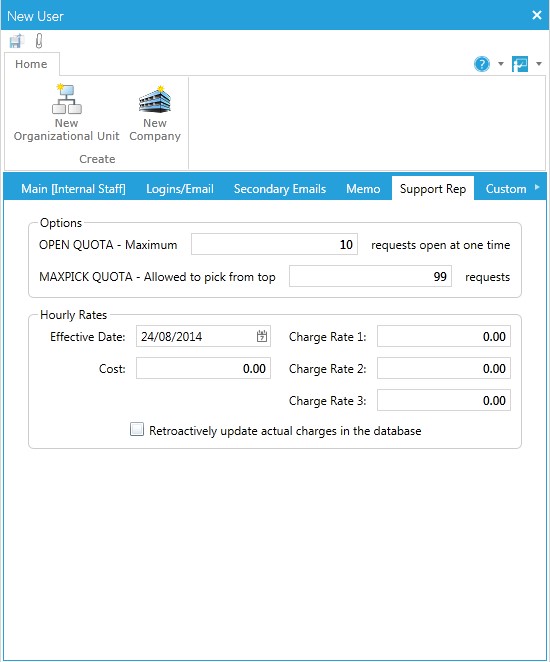
In the Options work area, select and define all applicable options:
Open Quota – Open Quota is a limit on the number of requests that a Support Rep may have In Service at one time. If a Support Rep is allowed to accept too many requests at one time, he/she can become burdened with the task of prioritizing and organizing those requests. This defeats the purpose of having prioritized Queues. If you wish, you may set this quota arbitrarily high (e.g. 999) to effectively remove its impact.
Max Pick Quota – This quota is designed to force the Support Rep to select from the top of the queue based on a FIFO (first in first out) queuing discipline. In the workspace, requests are listed in order of priority then by the time that they were logged (oldest first).
This option prevents Support Reps from accepting requests that are not high on the priority list. A Max Pick Quota of 1 restricts Reps to the first request. Set the Max Pick Quota to a number higher than 1 to let Support Reps exercise discretion as to which request they accept. A Max Pick Quota of 3 would allow the Support Rep to accept any of the top three service requests. Eliminate the quota by setting it to a very high number (999).
In the Hourly Rates area, enter charge rates for the Support Rep. These charges calculate the cost of the support your Help Desk is providing:
Effective Date – The date the charge rates are effective.
Cost – The hourly rates incurred by your company (salary, benefits). This field is intended for reference only and is not used in any reporting calculations.
Charge Rate (1–3) – Charge Rate 1 is a standard rate. Use the other charges for overtime rates. Reps can pick the correct rate when updating a request using ‘Time Code’.
The "Retroactively update actual charges in the database" checkbox is not relevant when setting up Support Reps. If in the future you set new hourly rates for the Rep, check this box to automatically recalculate cost and charge amounts based on a previous "Effective Date.”
Custom Fields Tab
The Custom Fields tab enables you to capture additional information related to the user by creating custom fields. You can create a User Type template to capture the custom fields using the Form Designer functionality.Saving the User
Click the Save icon in the Toolbar to save the new user.Manage – Managing Existing Users
Update
Updates can be made to the user fields after saving.Grant Access
Grant access details can be found at the following links:Permission Assignment (Professional)
Permission Assignment (Enterprise)
Applying Floating License to Users
Users that have been assigned permissions through grant access may log into the system using a floating license. If you have only one floating license available then only one user can login at a given time.
Applying Named License to Users
To ensure a support rep will be able to log into the system at any time, they must be allocated a named license. Search for a user and click on the Apply Named License option from the toolbar.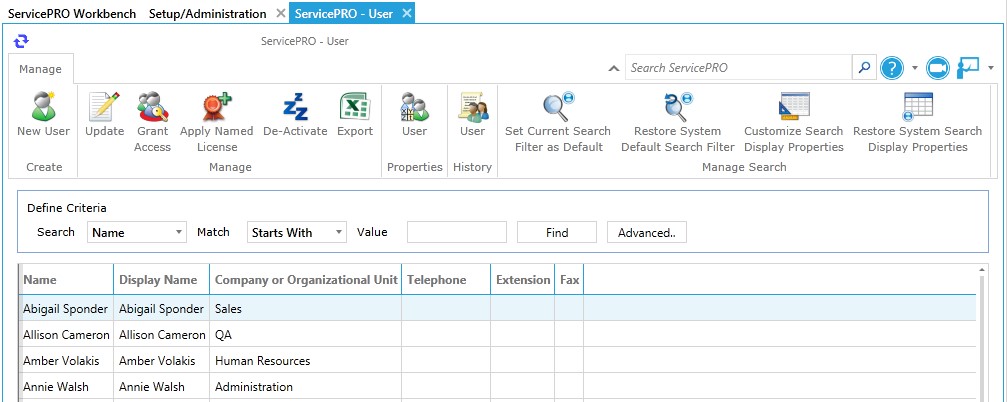
De-Activate
De-Activate a User from the system.When an existing user is de-activated /deleted, then ServicePRO will transfer the ownership of the user’s Public and Private Queries/Custom Reports/Charts to the ServicePRO Administrator selected in System Options – General tab.
On de-activating a user, a warning message will be displayed as below to inform that the de-activated user’s queries, reports and charts will be assigned to the ServicePRO Administrator.
“The user John Galen you are about to de-activate has role(s) assigned to it. Do you still wish to de-activate this user? Note: All Queries/ Reports/ Charts of the user will be assigned to ServicePRO Administrator”
Export
Export the list of Users in Excel (.XLS) format.Properties
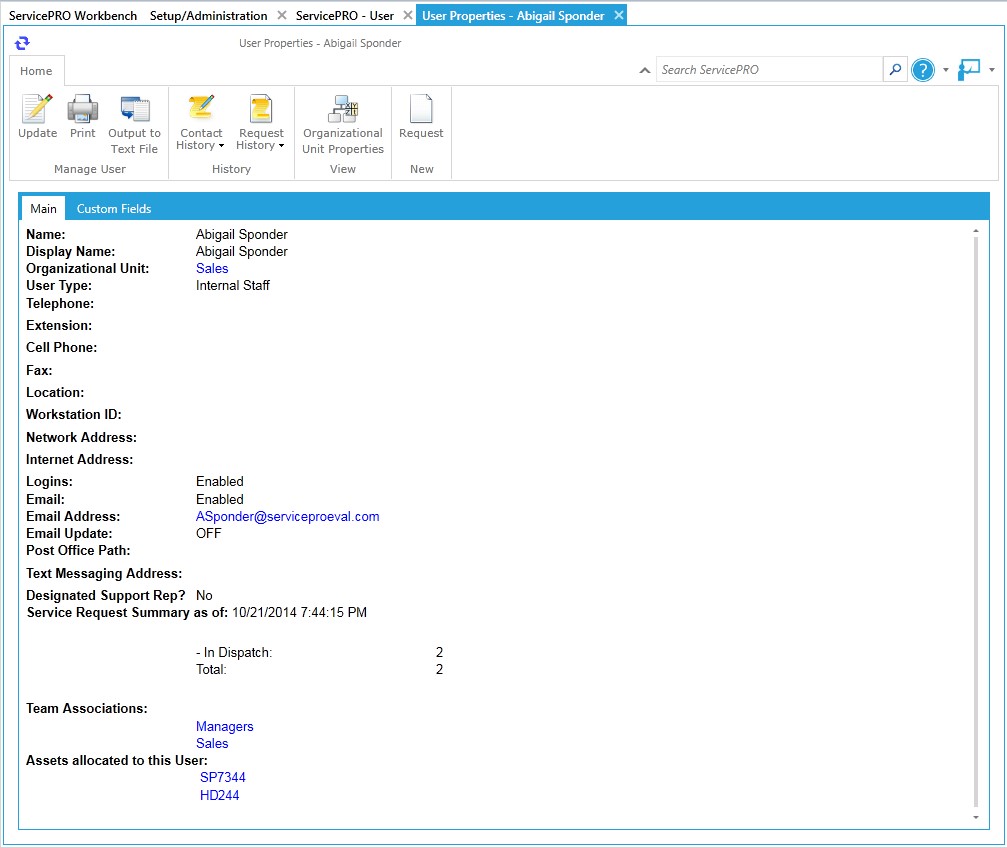
View User Properties for the selected User.Properties include fields such as Name, Display Name, Organizational Unit, User Type, as well as various contact information such as Telephone # and Email Address. In addition, Team Associations and Assets allocated to this User will be listed.
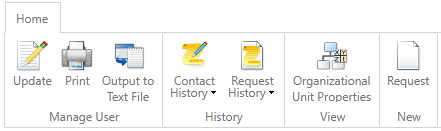
Additional options are available in the Ribbon Toolbar:
- Update – Update the User Properties in the Edit User window.
- Print – Print the User Properties.
- Output to Text File – Output the User Properties in .TXT format.
- Contact History – View all contact history associated with the User’s Company, Organizational Unit, or just the User.
- Request History – View all request history associated with the User’s Company, Organizational Unit, or just the User.
- Organizational Unit Properties – View the User’s Organizational Unit Properties.
- Request – Create a New Service Request with the current User set as the Requester.
 Manage Users - User Properties
History
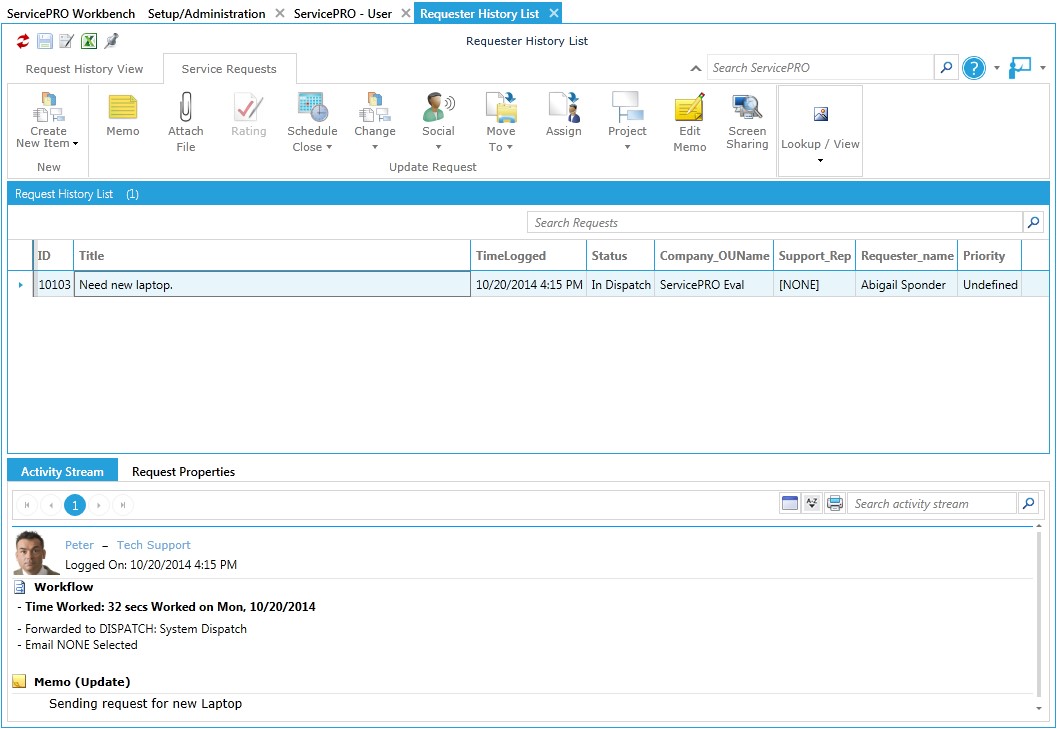
View a history of requests submitted by the selected User during the date range that you specify in the Requester History List.
Manage Search
Under Manage Search, select from the following options- Set Current Search Filter as Default – By default, name is the selected filter used to search for a ServicePRO object. By selecting this option, you can choose another filter as your default for future searches.
- Restore Default Search Filter – Set the search filter to the system default (name).
- Customize Search Display Properties – Select the company properties to be viewed when performing a search.
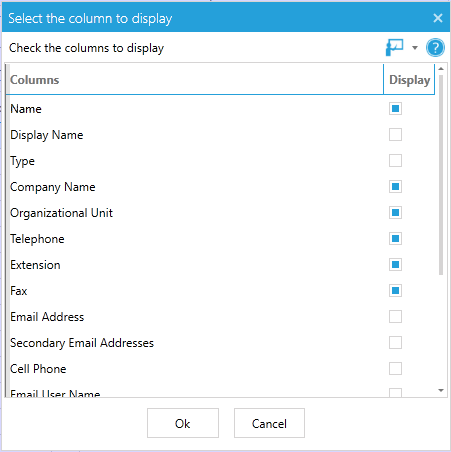 Customize Search Display Properties
 - Restore System Search Display Properties – Set the company properties to the system default.
Search
- The Find a User window appears as shown below.
 Manage Search
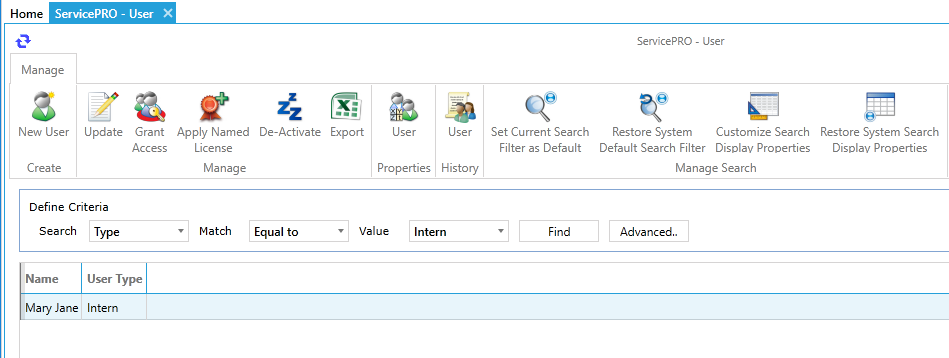
 - Select criteria from the Search and Match drop-down lists and enter a value in the Value field to help you narrow the list presented in the table below For example: Search: “Type” Match: “Equal To” Value: “Intern” This tells the system to search for all users whose user type is “Intern”
- When you refine your list enough, select the user you need to update or modify by double-clicking on that user’s name. The user properties will be displayed in a new window with the following four task groups as shown below.
The Ribbon Toolbar includes four task groups:
 Task Groups
1. Manage User Task Group
- Update – Update user information.
- Print – Print the user’s properties.
- Output to Text File – Save the user properties to a text file in a specified location.
2. History Task Group
- Contact History – View a history of recent correspondence made with the user, their company or organizational unit.
- Request History – View all support requests submitted by the user, their company or organizational unit for a specified date range.
3. View
- Company/OU Properties – View the properties of the Company or OU this user is associated with.
4. New
- Request – Create a new request with this user as the requester.
Advanced Search
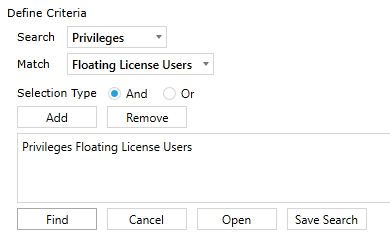
In the Define Criteria work area, click on the Advanced button if want to search a user based on additional filter options. For example, if a manager wants a list of the floating license users, he/she can search for Floating License User Privileges like in the image below. Multiple Search criteria options can be added and used. This helps to make the search query more granular.