Manage Products
Return to Manage Infrastructure
Products are items that can be purchased from a vendor, including hardware and software. You require the Asset Administrator privilege to add or modify products.
Navigation
- Navigate to the backstage menu by clicking on the ServicePRO icon.
- From the Management tab, click on the Manage Products option as highlighted below.
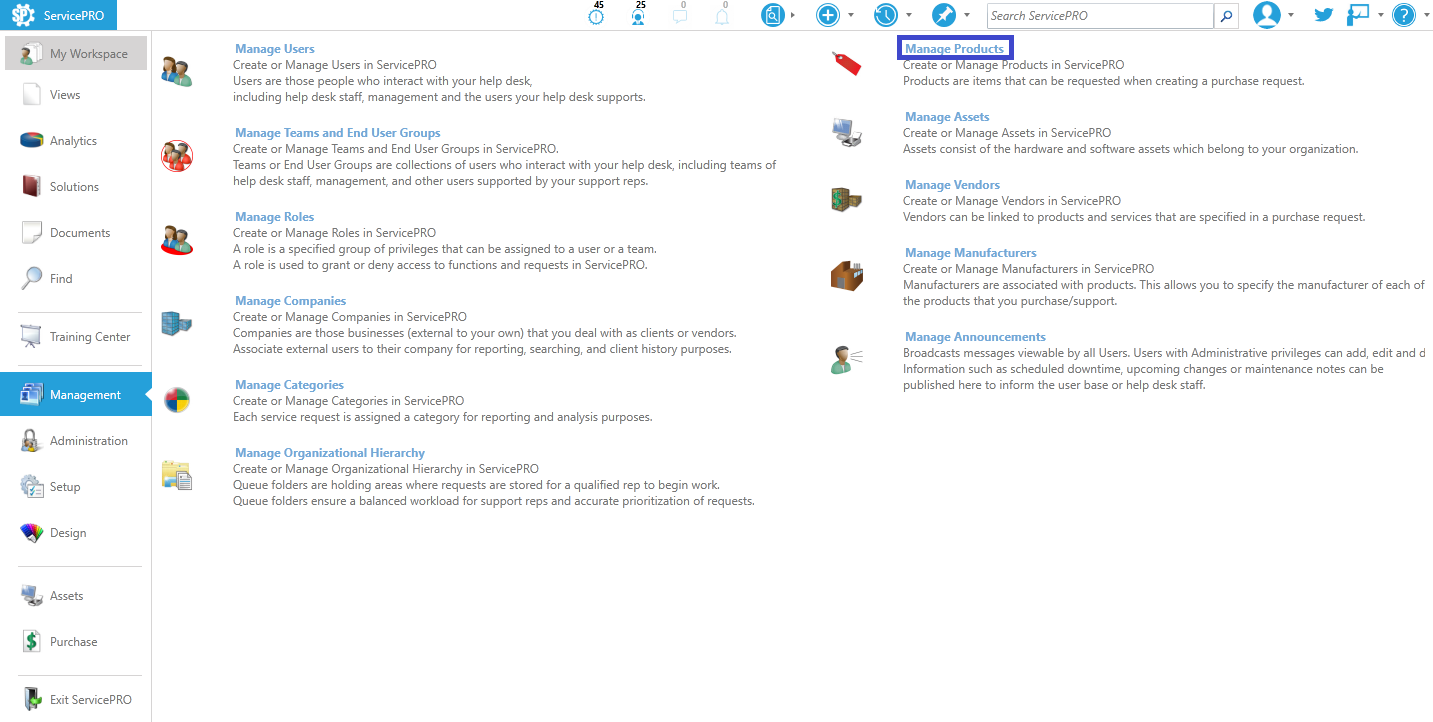 Manage Products Navigation
Adding New Products
New products such as software and hardware can be added into ServicePRO, and linked to vendors and manufacturers. Support Reps and end users can then submit purchase requests for these products.
Click on the New Product icon from the ribbon toolbar. The New Product window will appear. It contains two tabs, Main and Vendor, as shown in the figure below.
Main Tab
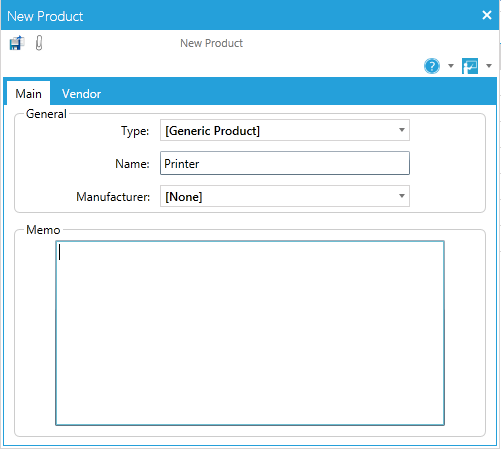
- In the Type field, select the type of product you are adding. By default, it will be “[Generic Product],” but two other options are provided (Hardware or Software). If custom product types have been created via custom object designer, those will be included in this drop-down list.
- In the Name field, enter a unique name for the product.
- Select the product’s Manufacturer.
- In the Memo field, enter any additional information about this product.
Vendor Tab
Products can be assigned to one or multiple vendors. Users with Asset Administrator privileges can add multiple vendors that offer this product. Values for the vendor’s product can be entered in the Price column.

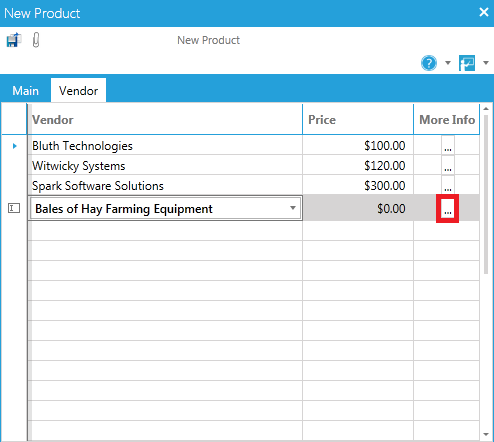
The Ellipsis icon allows you to add additional information to the Vendor
Click on the Ellipsis icon to open a new window, which will allow you to enter vendor information such as contact, support, warranty, and maintenance information.
When you have entered all the vendors that offer this product, be sure to click the Save icon in the Toolbar to save the new product.
Managing Existing Products
Users with Asset Administrator privileges can add, update, or de-activate a product as needed.
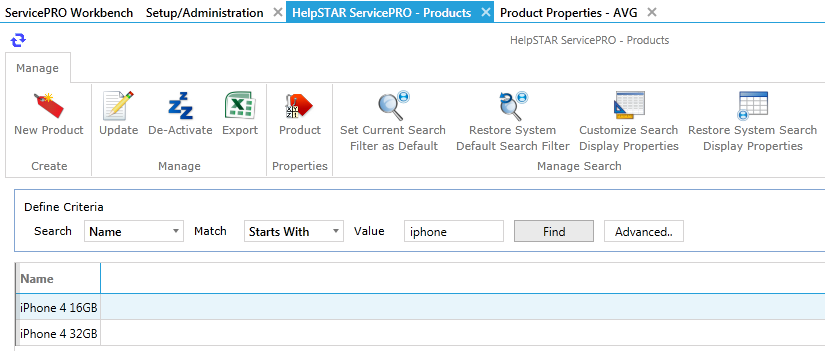
- In the Define Criteria work area, select criteria from the Search and Match drop-down lists and enter a value in the Value field to help you narrow the list presented in the table below this work area.
For example, entering:
Search: “Name” Match: “Starts With” Value: “K”
…tells the system to search for all products whose names start with the letter “K”. In the figure above, the search would return a table listing only "Keyboard". - Click on the Find button. The search results will be displayed in the table.
- Select the product you need to update or modify by double-clicking on that product’s name. The product properties will be displayed in a new window. Product properties will appear with a Manage Product toolbar in the ribbon, as shown below.
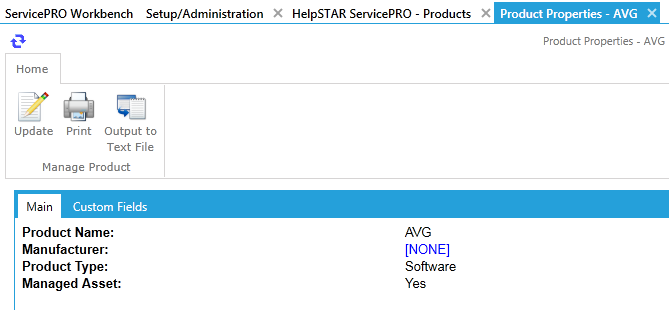
The following tasks can be accessed by clicking on the corresponding icons:
- Update – Update product information.
- Print – Print the product properties.
- Output to text file – Save product properties to a text file to a specified location.
You can also highlight the product in the Find a Product window and use the Home toolbar icons in that window to access features that will help you add new, update, de-activate, and so on.
Products as Assets
When products are received via the purchase order process, they become Assets, and are automatically allocated to the User, OU, Company or to the inventory.
It is possible to have assets that will not be allocated – for example, expendable items such as printer cartridges or paper. In this case, you can create a “Consumable” asset type via custom object designer.
If your organization keeps an inventory of assets (for example: keyboards, monitors, and hard drives), you can allocate spare assets to Inventory. In this way, your spare assets will be tracked by ServicePRO and you can re-allocate these assets to users, OUs, and so on when they are needed.