User Options
Overview
User Options is located at the top of the Workbench screen under the Settings icon.Use the User Options window to define your personalized view of ServicePRO. You can change a variety of options such as your current password, enable spell check, and much more.
General
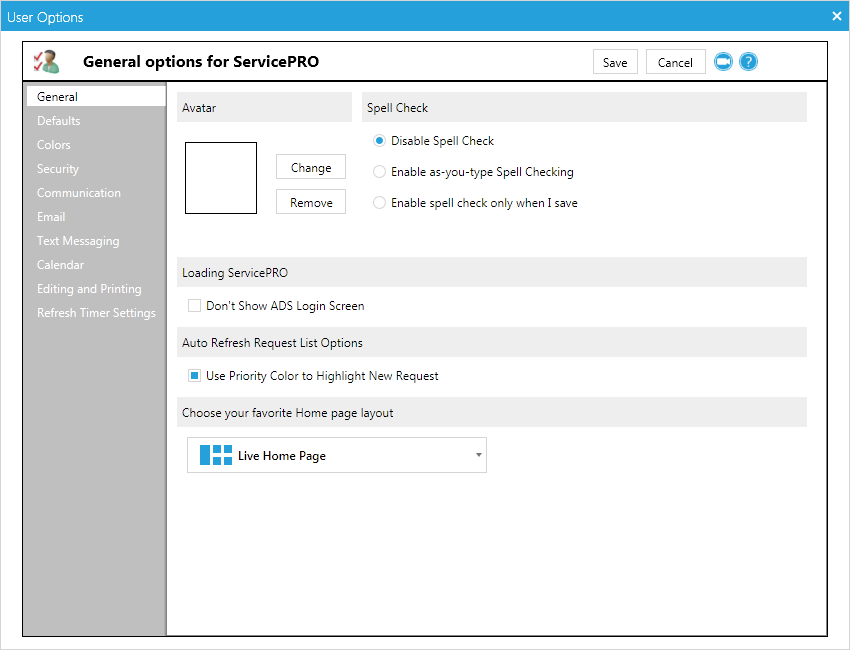
The General option provides access to various options that define how your ServicePRO view will look and operate.- Avatar – You can add your image to your profile so that it can be displayed in the memo entries. Simply click on the Change button to open a dialog box to locate the image you want to upload. The selected image may not exceed 20KB.
- Spell Check – Enable or disable automatic spell check when updating Service Requests and Best Solutions. In ServicePRO, there are three Modes for Spell Check facilitated with memo editor:
- Disable Spell Check: This mode will not perform Spell Check.
- Enable as-you-type Spell Checking: This mode checks spelling as you start typing the words.
- Enable Spell check only when I save: This mode will not perform Spell Check as you type but on saving, it will prompt you with the correct words from the Dictionary.
NOTE: User's Custom Spell Check Dictionary will be persisted between the ServicePRO versions starting with version 14.2.10.3 on-wards.
- Loading ServicePRO – Choose your default setting when logging into ServicePRO. Checking 'Don't Show ADS Login Screen' will bypass the initial AD Pass-through confirmation and log you in with your AD credentials. This option will only take effect if AD authentication is enabled.
- Auto Refresh Request List Options – Set whether you want the new requests in your workspace to appear in the priority color when new requests appear in the workspace. Colors are set using the Colors option.
- Choose Your Favorite Home Page Layout – Select a Home Page Layout. This determines how your Interactive Tiles will be arranged, and what tiles will be available by default.
- This setting only affects the Interactive User Interface if it has been enabled from System Options.
- Users may only view Home Page Layouts enabled for them, based on the User's Team association. Enabling layouts for specific Teams can done from the Home Page Designer.
- Please note that users will need to restart ServicePRO for Interactive Tile layout changes to take effect.
Defaults
The Defaults option allows you to set your personal default queue and service folder. The default queue specifies the location within which new requests created by you will be placed. The default service folder specifies the queue folder a request will move to when you take ownership of a request in Dispatch. You must have the Support Rep role on the folder to be able to assign it as a Default Service Folder.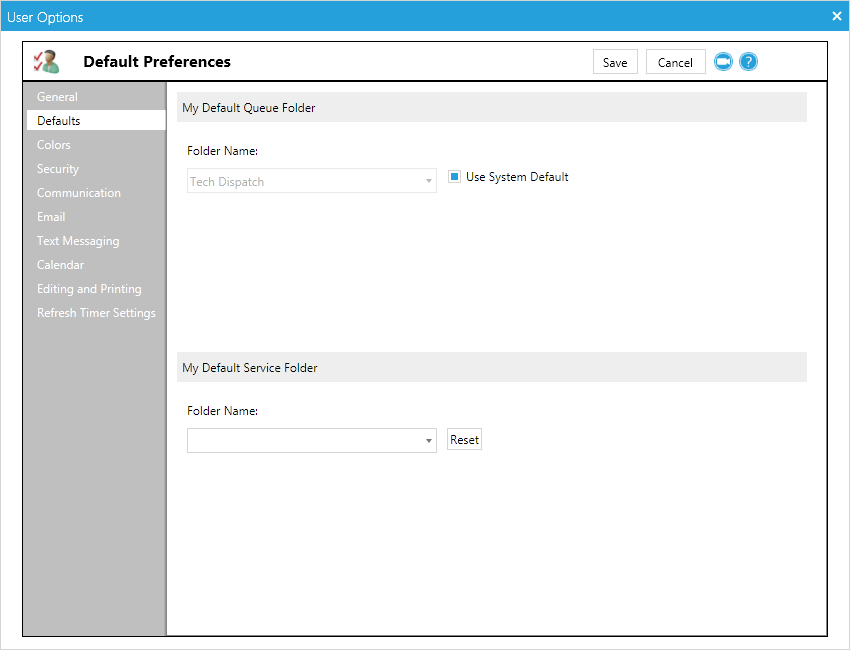
Colors
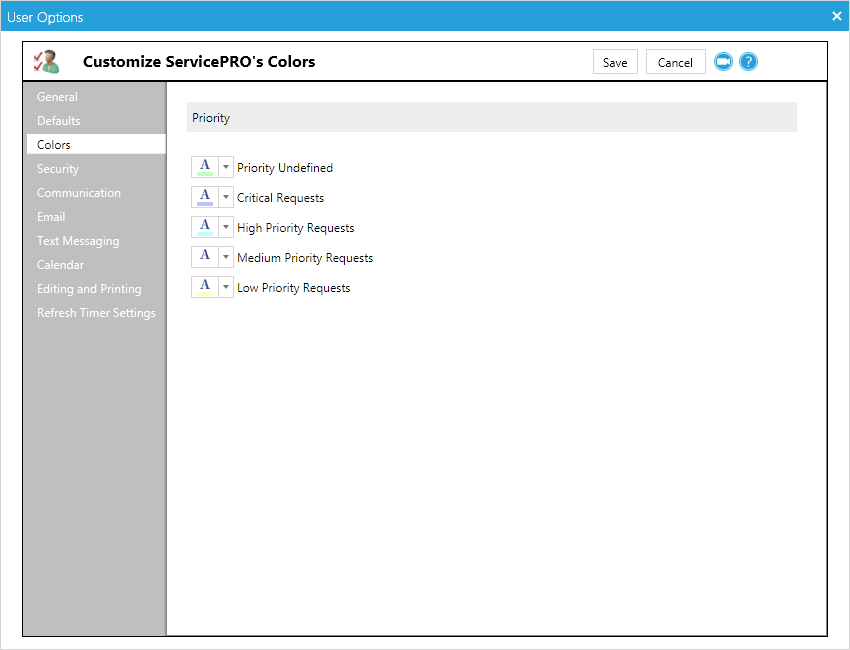
Define highlight colors for requests as they arrive in your Workspace during automated refresh. Colors will not be applied after manual refresh of the Workspace or after subsequent automatic refreshes.Color highlights can be defined separately for each priority (Undefined, Critical, High, Medium, Low).
Security
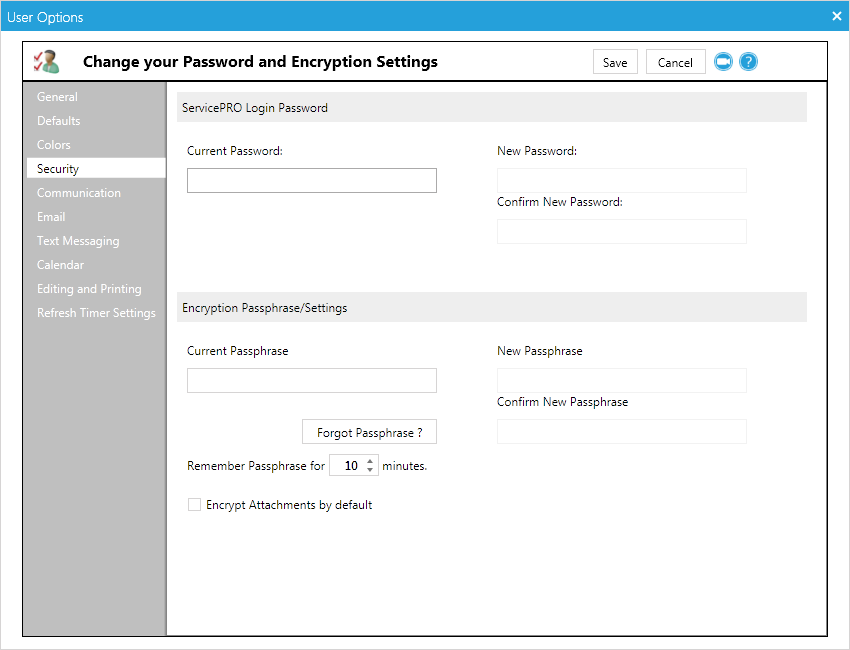
The Security option helps you set or change your password for your ServicePRO login. It allows users to set passphrase when encrypting documents in ServicePRO- ServicePRO Login Password – Change your ServicePRO password.
- Encryption Passphrase/Settings – Create or change your encryption/decryption passphrase. Change the interval for how long your passphrase will be remembered. Set encryption to default for attachments.
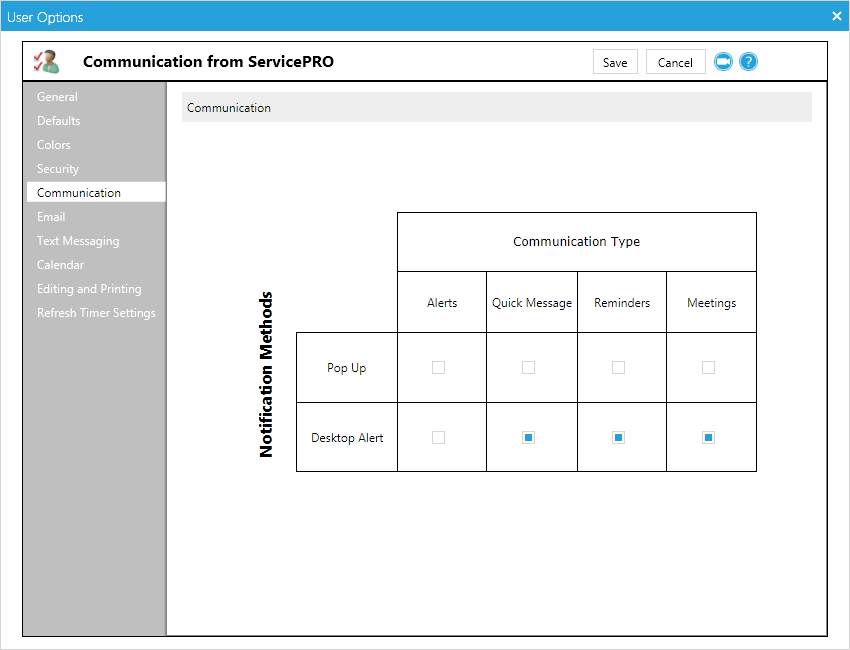
Communication
The Communication option allows you to set how you would like to be notified of Alerts, Reminders, and Quick Messages.- Pop Up – A message box will appear on the screen indicating that you have received a new communication. This message will also appear upon logging into ServicePRO if any communications have not yet been viewed.
- Desktop Alert – A small pop up appears just above the Window System Tray when the communication is received.
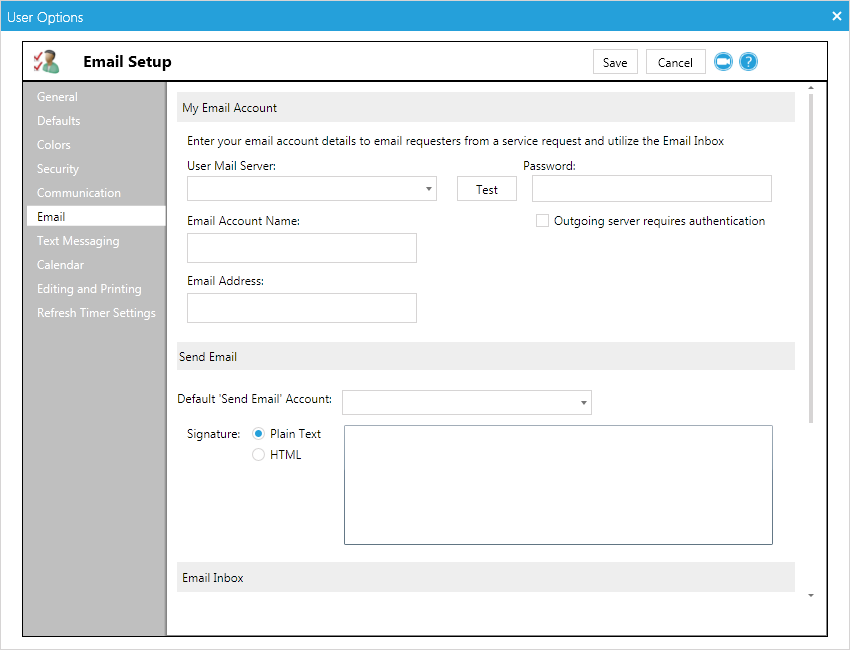
- My Email Account – Configure your User Email Account to be accessible from Email Inbox as also be available as a From address when using Send Email in a request.
- When connecting to Exchange, the Email Account Name will be the SAMAccountName of the AD user owning the mailbox. Also, please ensure that the Email Address entered is the default SMTP address of the mailbox.
When using EWS with OAUTH 2.0 for User Email Settings, users cannot change the settings under User Options -> Email -> My Email Account section.
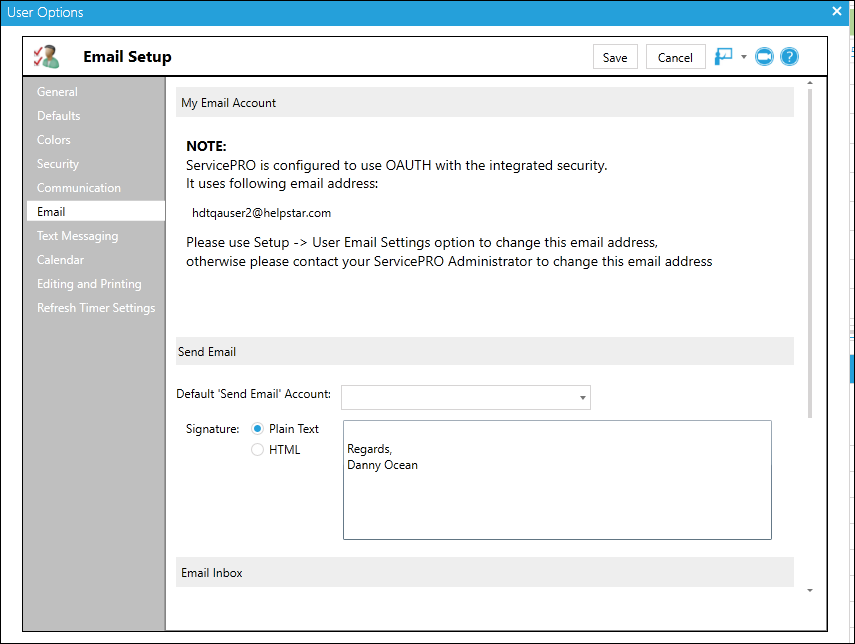
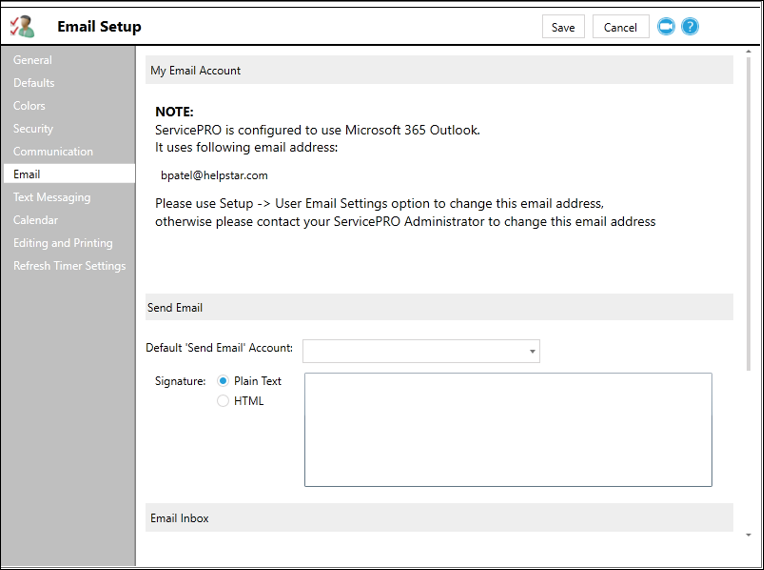
- Default Send Email Account – Specify a default email account that is used for the Send Email option. This is the account that will be used when you send an email from a Service Request. This may be a System Email Account or your User Email Account.
- Email Signature – Specify a signature to be included when sending email from a request.
- Email Inbox – Configure options for using Email Inbox. Four options available are:
- Select whether you want to allow others to check your emails.
- Display notification messages when new emails arrive.
- Set ServicePRO to check for new messages.
- Set the default action for Email inbox messages that have been marked for deletion
- Update via Email – select whether you would like to receive your entire request history or the current memo when receiving emails on requests you are the requester of. You can also set how emails will be displayed in the activity stream.
Text Messaging
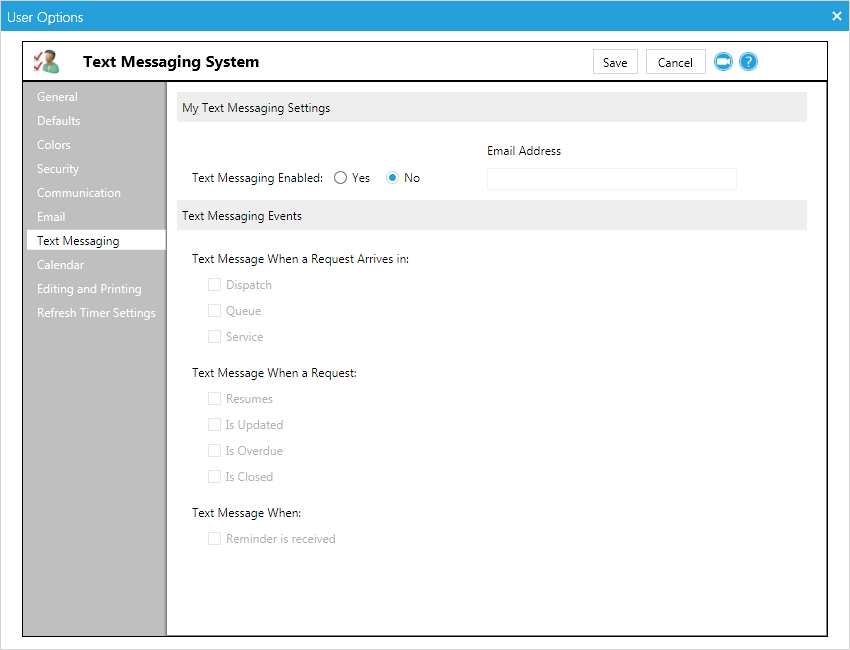
When Text Messaging is configured and enabled by the Administrator, Support Reps may set their text messaging address, events on which to receive text message notifications, and also whether they would like to receive text messages.Note that the address used is an email address, for SMS messages to be delivered to your phone, you must acquire the SMS email address from your carrier.
Calendar
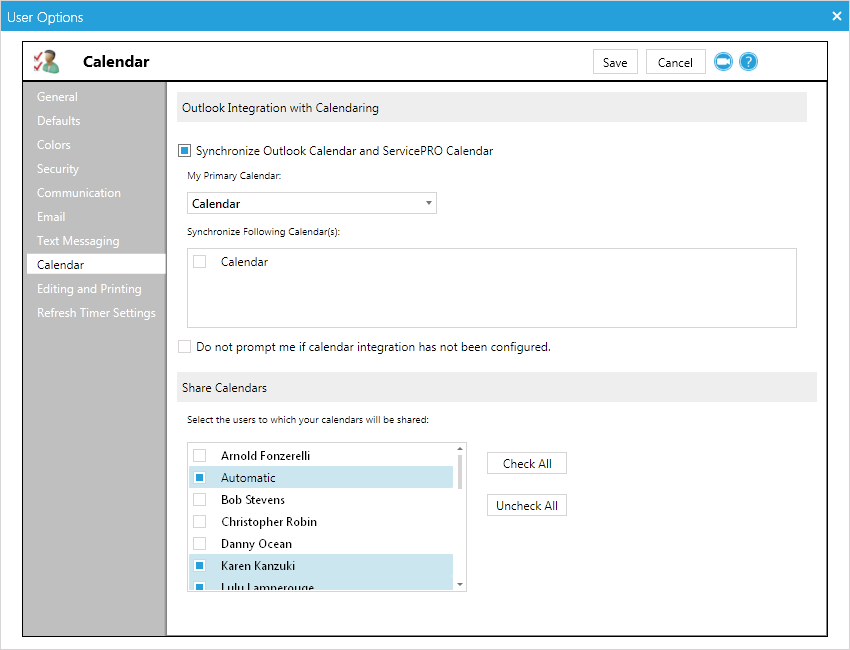
When Calendar Synchronization is configured and enabled by the Administrator, Support Reps may synchronize their Exchange calendars with ServicePRO, and also use ServicePRO to share their calendars with other Support Reps.For additional details, please view the section on ServicePRO’s Calendar.
Editing and Printing
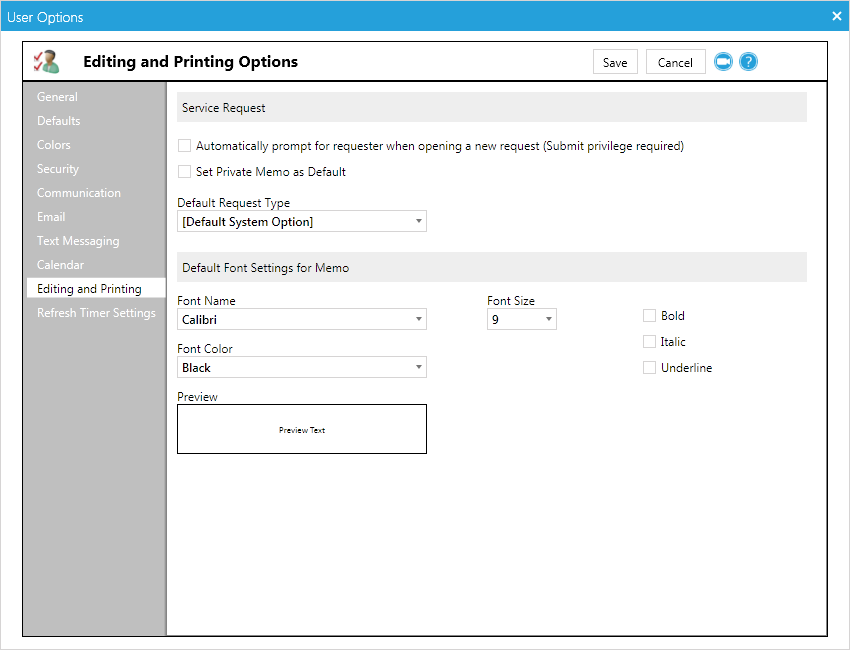
The Editing & Printing page helps you define basic parameters for handling service requests and purchase orders. Service Request – This section helps you define three parameters for handling service requests:- Select whether you want to the Find a User window to auto launch when opening a new request.
- Set the default for your memos to “Private.”
- Select the Default Request Type (window) for a new request.
- Default Font Settings for Memo – Set the default font that will be used when you are using the memo field in a Service Request.
- Purchase Order – When saving a purchase order, select if you want to be prompted to print the purchase order, prompted to Email the purchase order, or forego prompts entirely.
Refresh Timer Settings
The Refresh Timer Settings page allows you to set the automated refresh interval for various areas of ServicePRO. These rates can be set based on whether ServicePRO is Onsite or Offsite.- Refresh Timers Tab
- Alternative Refresh Timers Tab
- Network Settings Tab
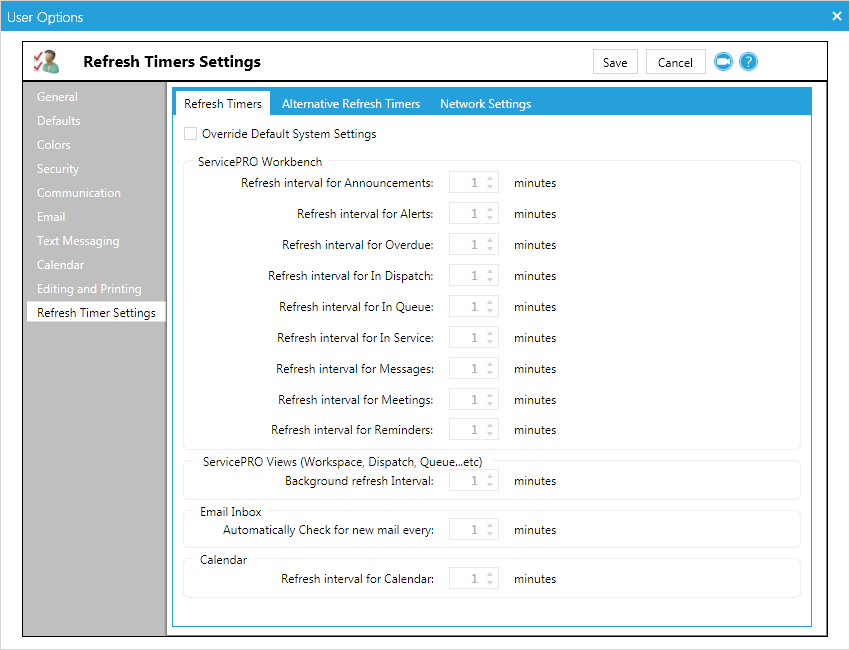
Refresh Timers
The first tab for Refresh Timers allows users to set Refresh Intervals for various ServicePRO pages, including the In Dispatch folder, Messages, and Email Inbox screens.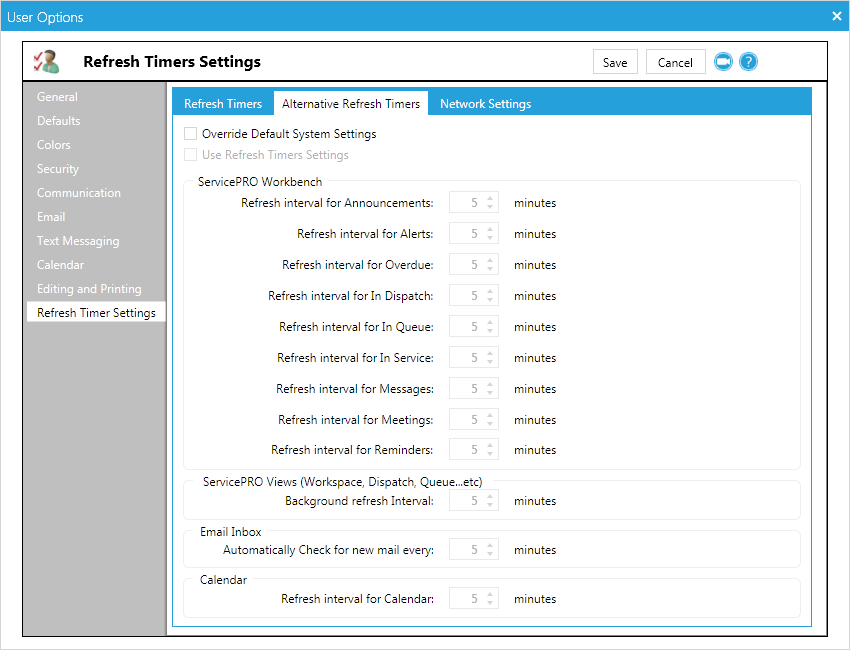
Alternative Refresh Timers
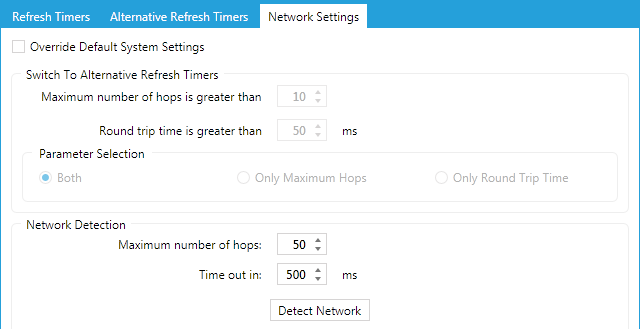
This tab is similar to the Refresh Timers tab, with the additional option to Override Default System Settings. This second set of Refresh Timers is useful for when you are accessing ServicePRO from a location outside of the office, and accessing information from a location where you are not directly connected to the network.Under “Network Settings”, set the maximum amount of hops and/or latency to the ServicePRO server before a user is considered “Offsite.”
There are two parameters that the user can set - either one of them OR both settings can be enabled:
- When the maximum number of hops is greater than certain number
- When the round trip time is greater than the specified time out