ServicePRO Web Support Portal - Fast Mode
Return to ServicePRO Web Support Portal or ServicePRO Web Home
Contents [hide]
Overview
ServicePRO Web fast mode presents the support rep with a simple, user friendly, request listing view. Fast Mode facilitates the support rep to glance through their requests, put them into their service, make quick updates and/or send email.Enable Fast Mode
Fast mode is enabled from the Portal Designer – Licensed User Options. NOTE: Portal Designer is only available for ServicePRO Administrators. For more information, please refer to Portal Designer - Licenced User. .
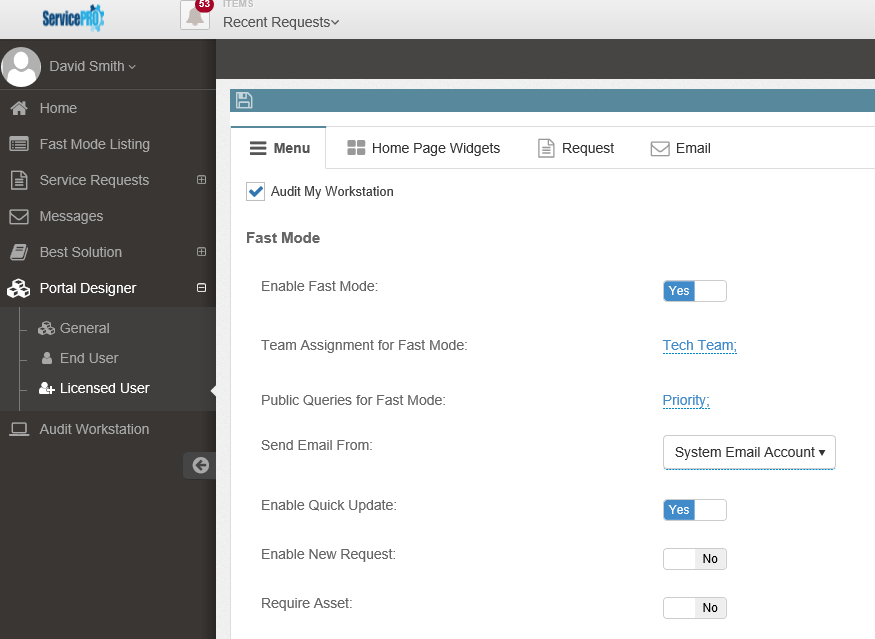
When Fast Mode is enabled, ServicePRO administrator will have three additional options to configure:
- Team Assignment for Fast Mode
- Select Teams for which Fast Mode will be enabled in ServicePRO Web.
- Fast Mode will be enabled for all the users under these teams when they log into ServicePRO Web.
- Users who are not part of any of these teams will be presented with the normal home page in ServicePRO Web.
- Public Queries for Fast Mode
- Select List of Public queries to display in the dropdown option in the Fast Mode home page.
- The very first public query selected will be loaded in the fast mode request listing view by default.
- From the landing fast mode view itself, the support rep will be able to select from the available public queries, or from the In-Queue view and In-Service view. The selected view will be persisted for the user whenever the user logs back in.
- Send Email from Fast Mode
- Option to specify if the User email account or the System email account is to be used while sending email from Fast Mode.
- Enable Quick Update
- Enables the Edit button in Fast Mode. If this is not enabled, users can only view requests.
- Enable New Request
- Enables users to create a new request from Fast Mode. When user clicked on “New Request”, they will be taken into the regular ServicePRO Web Interface to log a new request.
- Require Asset
- Require user to specify an asset before a request can be submitted.
When the user from the selected team logs in, they view the results of the query as soon as they log in. The user can select Home option to go to the Home page.
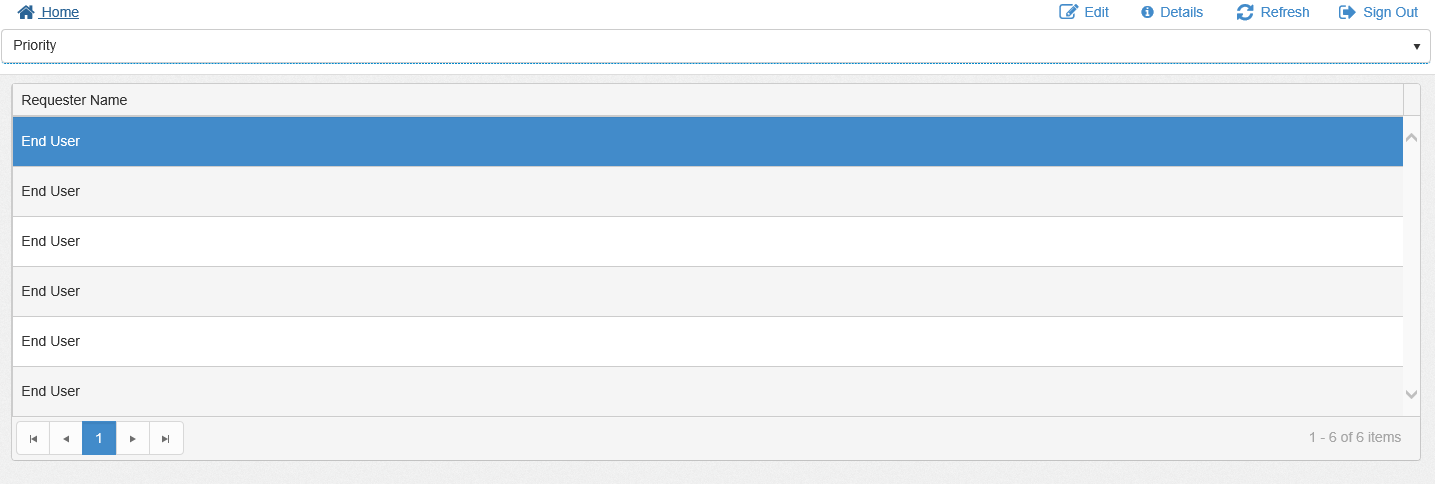
Fast Mode Request List view
In the Fast Mode Request Listing view, there are three drop-down Options: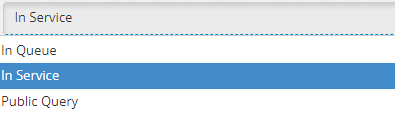
Drop-Down Options - List View
- In Queue – Shows all the requests “In Queue” Status for current user.
- In Service – Shows all the requests “In Service” for current user.
- Public Query – Shows all public queries specified under Portal Designer, “Public Queries for Fast Mode”.
Toolbar options:

Tool Bar Options - List View
- Home - icon tool bar option takes the user back to the regular home page.
NOTE: User can go back to “Fast Mode Listing" view from the Home Page.

- New Request - option creates a new service request
- Edit – option enables to perform a quick edit inline in the grid.
- Details – option opens the detailed preview of the request
- Refresh – option refreshes the list
Fast Mode Edit view
In Fast Mode Edit View, user will only be allowed to edit limited properties that are listed below and send email:Properties Tab:

Properties Tab - Edit View
- Assign – on/off switch option thus facilitating the user to quickly assign or un-assign the current request to themselves.
- Suspend – on/off switch option thus facilitating the user to quickly suspend or activate (set to ASAP) the current request.
- Close – on/off switch option thus facilitating the user to quickly close or reopen the current request.
- Memo – Allows the user to enter a quick plain text memo.
Email Tab:
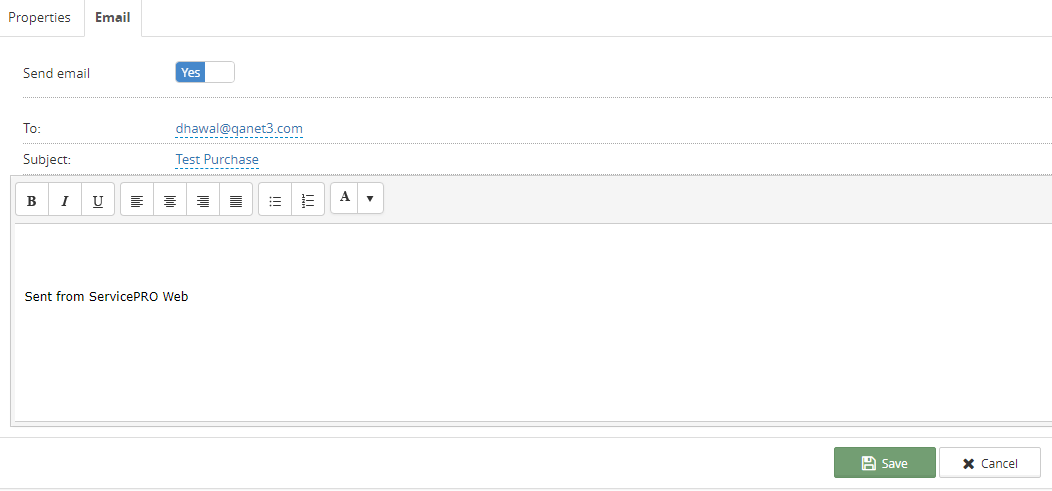
Email - Edit View
NOTE: ‘From’ email address will be taken as current user’s email address or Default System Email Account based on the option set under ‘Fast Mode’ section in Licensed User Portal Designer options. .
- To field – This field will be defaulted to the requester. The support rep will have the option to choose other user email addresses as recipients and the field has autocomplete feature enabled.
- Subject – This will be set by default with the title of the current request. If the ‘From’ email address is System Email Account, then the Subject field will be hidden.
- Mail Body – Allows the user to enter Rich Text memo.
Fast Mode Details View
In Fast Mode Detail View, only limited fields as listed below are available to preview and edit:Details Tab:
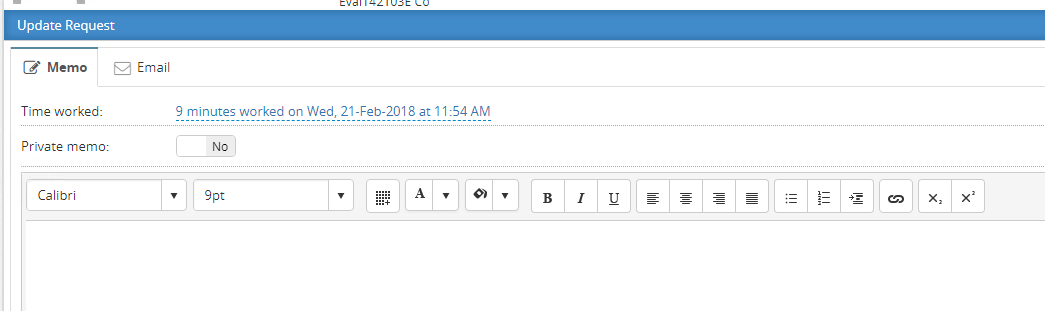
Update Request - Details View
- Update Request - User can update the current request and send an email under this option.
Update Request - Details View
- Activity Stream – Shows all the current and past activities related to the request
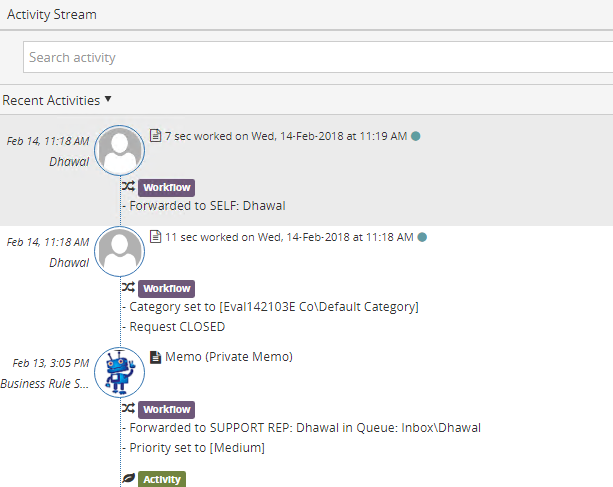 Activity Stream - Details View
Properties Tab:

Properties Tab - Details View
- Email Notifications – Option to enable or disable Automatic Email Notification to Requester and CC list recipients.
- Assigned To – User has the option to Assign or Unassign the current request to Self or other Support Reps.
- Begin Work – User have the option to change the Wait Status from ‘ASAP’, ‘Waiting for Response’, ‘Suspend’ or ‘Schedule’ the request
- Closed – on/off switch option thus facilitating the user to quickly close the current request.
Fast Mode Logout
Exit/Sign out option is located at the top-right corner as shown below.