Priority Escalation
Return to: Configuration/Setup
Contents [hide]
Overview
Set the escalation intervals for base and current priorities for ServicePRO requests.- From the Configuration tab, click on the Priority Escalation option. The Configure Priority Escalation Window appears as shown.
- From the Home tab, there are three choices in the Create group: New, Edit and Delete.
- Click New to create a new Configuration.
- To Edit an existing configuration, select the configuration you want to edit from the Priority Escalation Groups work area then click on the Edit icon. The window changes to include the work areas shown in the figure below.
 Configure Priority Escalation - Escalation Matrix Work Area
 - The Escalation Matrix work area helps you set the escalation intervals for every combination of Base Priority and Current Priority. Click on an icon in the matrix to set the escalation interval by days, hours, and/or minutes.
- Base Priority – A request's original priority value when logged.
- Current Priority – A request's most recent priority value
- Click on the Save icon in the Toolbar to save your settings. You will be taken back to the Configure Priority Escalation window.
- In the Status work area, enable or disable the database monitoring for auto-escalation performed by the StarWatch service.
- In the Scanning Interval/Alert Settings work area, enter a number to indicate how often the StarWatch service should scan the database and evaluate requests for auto-escalation.
- Click on the Issue alert if unable to escalate requests checkbox to receive alert messages in the event that priority escalation stops working.
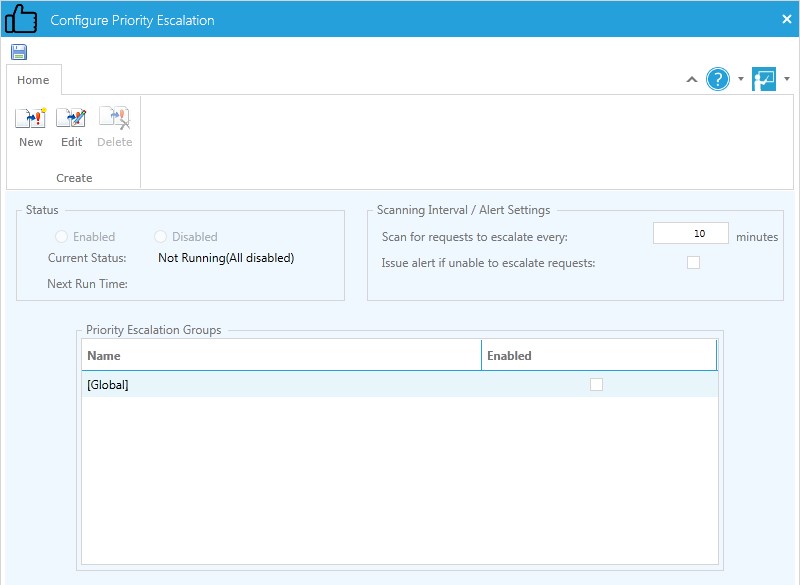 Configure Priority Escalation Window
Creating Custom Escalation Groups
Custom escalation groups can be configured to run instead of the [Global] default escalation group, and multiple custom groups can be created.Different escalation interval settings can be applied to different types of service requests. These escalation interval settings can be applied to different types of service requests.
When a group with a particular combination of Wait State and Request Status is created, this combination will not be available unless the current group is deleted.
- From the Configuration tab, click on the Priority Escalation option. The Configure Priority Escalation window opens.
- Click on the New icon. The Configure Priority Escalation window changes to include the work areas shown below.
 Escalation Group Work Area
 - Enter a Group Name for the configuration.
- The refreshed window helps the selection of a specific combination of Wait State and
- Request Status to create a customized escalation group.
- Choose from any combination of wait state and request status from the respective drop-down lists shown below.
- Click on the “In Queue” or “In Service” hyperlinks in the Apply to Requests which are drop-down list to select specific queues or support Reps for this custom escalation group. Selecting different queues allows the separation of escalation intervals.
 Escalation Group Wait State and Request Status Selection
Queue Selection
- Click on the Specific Queues radio button.
- Drag the queues you want to include from the Available Queues list to the Selected Queues list.
- Click on the OK button. The window changes to include the Escalation Matrix work area.
- Enter the interval settings by clicking on the icons in the Escalation Matrix work area.
- Click on the Save icon in the Toolbar to save the configuration.
- A custom escalation group cannot be run when the Global group is enabled. In the Priority Escalation Groups work area, disable the Global group before enabling your custom group(s).
- In the Status work area, enable or disable the database monitoring for auto-escalation performed by the StarWatch service.
- In the Scanning Interval/Alert Settings work area, enter a number to indicate how often the StarWatch service should scan the database and evaluate requests for auto-escalation.
- Click on the Issue alert if unable to escalate requests checkbox to receive alert messages in the event that priority escalation stops working.
- After you have enabled the group(s), click on the OK button to run Priority Escalation.
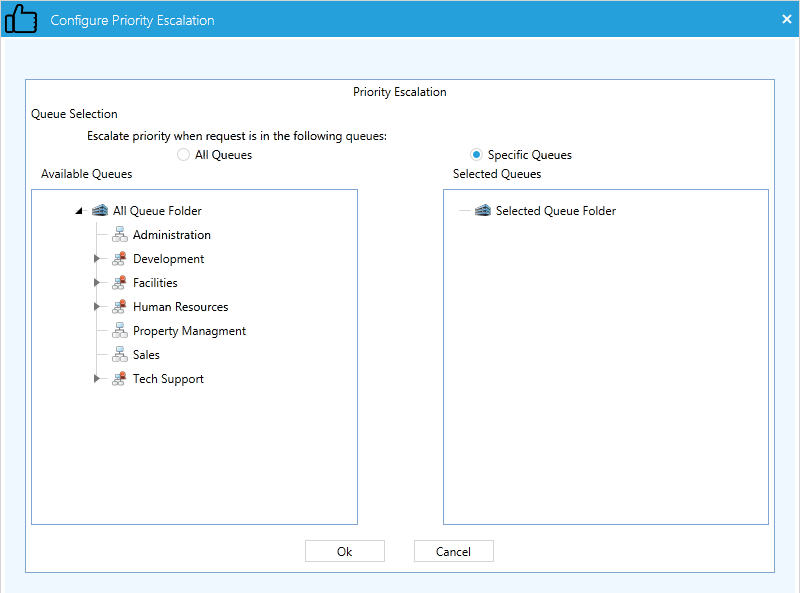 Queue Selection
Tips and Best Practices
- When using priority escalation, ensure that the Wait State value is set to “ASAP;” otherwise the StarWatch service will escalate scheduled and suspended requests.
- Properly designed escalation groups will assist your Support Reps by prioritizing their requests for them.
- If the escalation intervals are set too close together, all requests will be escalated before technicians can work on them, rendering the prioritization useless.