Business Hours
ServicePRO keeps track of the elapsed time that service requests are In Dispatch, In Service, In Queue, and In Suspense. The elapsed time is for efficiency reports, the Dashboard’s Response and Resolution charts, and for the time interval setting in reminders.
By default, ServicePRO assumes that your Help Desk is open all day, every day and will calculate intervals accordingly. However, your Help Desk’s performance will be misrepresented if the elapsed time includes days or hours when your Help Desk is closed. Use the Business Hours function to set the actual hours that your Help Desk is open. Only those hours will be used in ServicePRO’s elapsed time calculations.
Navigation
- Navigate to the backstage menu by clicking on the ServicePRO icon.
- From the Setup tab, click on the Business Hours option as highlighted below.
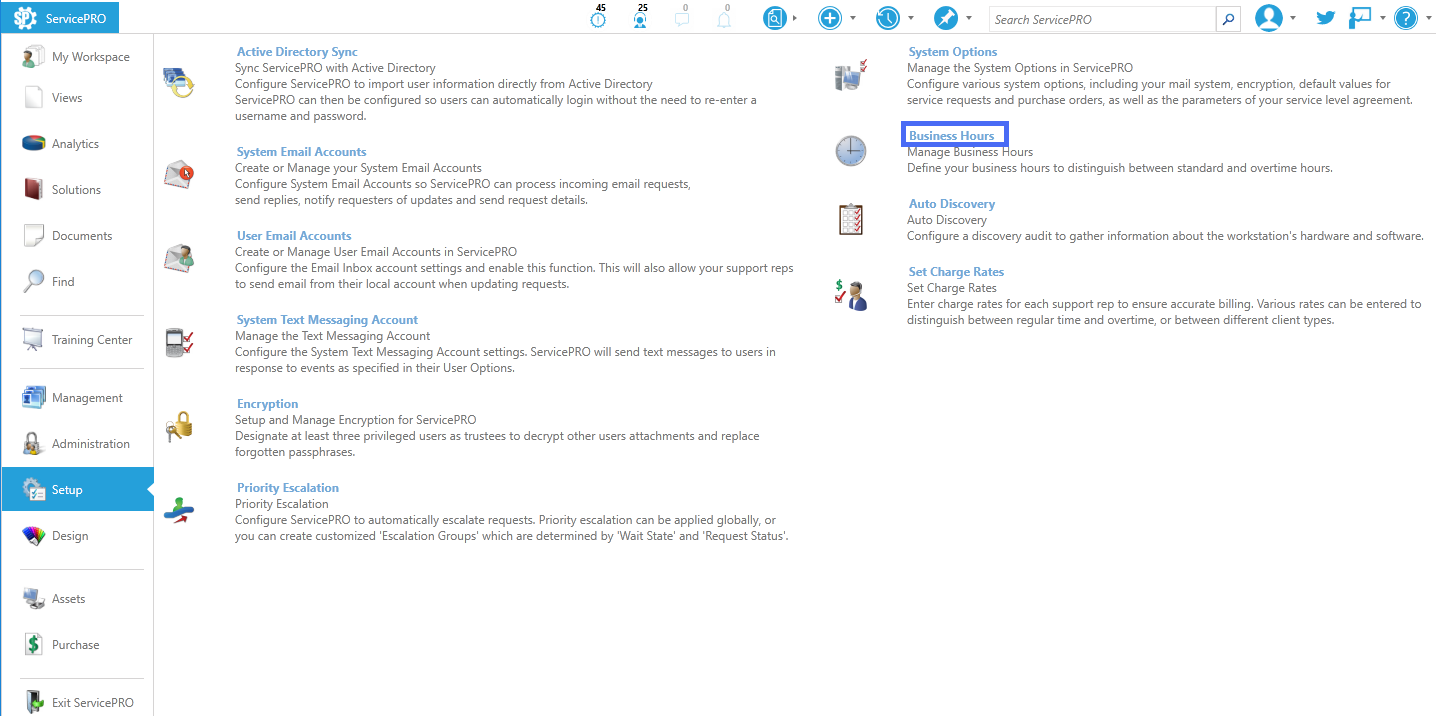 Business Hours Navigation
Setting Business Hours
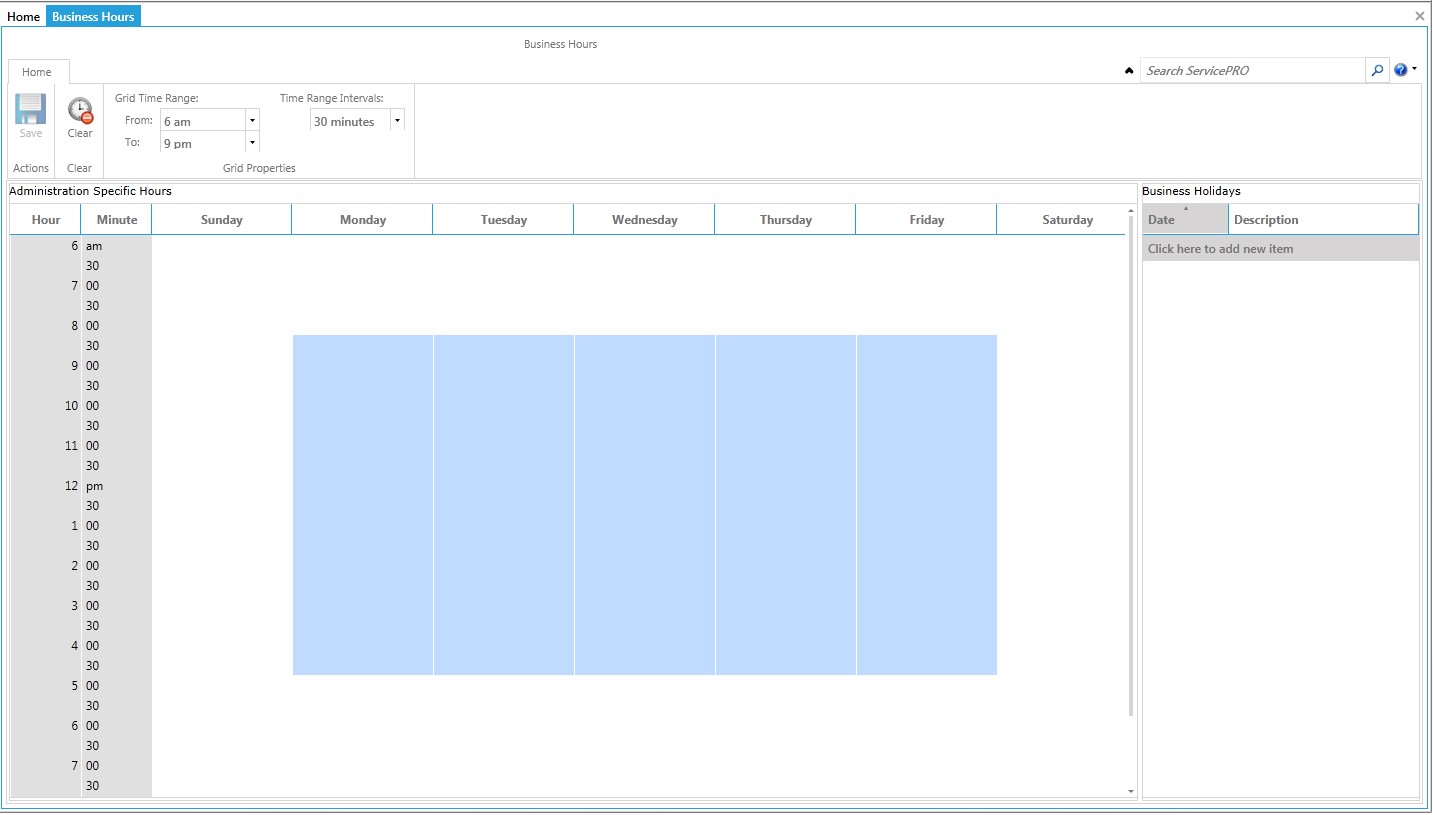
- In the Grid Properties work area, indicate the daily time range you want to display in the grid.
- Each cell in the grid represents a block of time. The default time interval for each cell is 30 minutes. If necessary, change the Time Range Intervals.
- To set your business hours, hold down the left mouse button and drag the cursor over the appropriate hours in the grid then release the mouse button. You can also click on the individual cells. Selected cells appear in blue.
- To undo a selection, repeat step 3. The cell color returns to white.
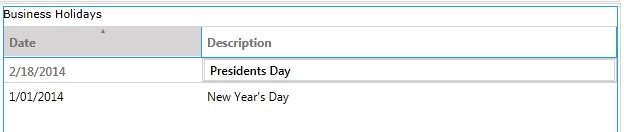
Business Holidays Work Area
Use the Business Holidays work area to set the specific dates that your Help Desk will be closed. The example in the figure below includes three holidays.
- Click on the field immediately under Date to open a calendar.
- Select the date of the holiday.
- Enter a description (for example, New Years Day). Click Enter to set the holiday date.
- Repeat the process to set additional holidays.
Saving and Clearing Business Hours
- After you enter your business hours, click on the Save icon in the Toolbar to save them.
- To clear business hours, hold down the left mouse button and drag the cursor over the appropriate hours that appear in blue within the grid then release the mouse button. You can also click on the individual cells. Cleared cells appear in white.
Auto Discovery
From the Configuration tab, click on the Auto Discovery icon to open a window that helps you configure ServicePRO’s network auditing function. See “Network Audit Engine” for more information.
Set Charge Rates
The Set Charge Rate function helps you define hourly charge rates for a selected Support Rep.
- From the Configuration tab, click on the Set Charge Rates option. The Support Rep Charge Rate window opens as shown below.
- Select a Rep from the Support Rep drop-down list.
- Enter the date that the charge rates become effective in the Effective Date field.
- Enter the rates in each of the following fields as needed. These charges calculate the cost of the support your Help Desk is providing:
- Cost – Typically the costs incurred by your company (hourly rates or salary, and benefits). This field is intended for reference only and is not used in any reporting calculations.
- Charges 1 to 3 – Charge 1 is typically your standard rate. Use the other charges for overtime rates.
- he Retroactively update actual charges in the database checkbox is used for existing Support Reps who have time logged in ServicePRO already (not for setting up new Support Reps). Check this box to automatically recalculate cost and charge amounts based on a previous effective date.
Customize Tab
For more information on the “Customize” tab, please view the section on the Custom Object Designer.